
Accessory-drive technical guide
A serpentine belt is one part of a complete accessory-drive system
A chirp, squeal, slap, frayed edge, thrown belt, charging warning, rising temperature, heavy steering, or weak air conditioning does not automatically identify a worn belt. The accessory drive can include a multi-rib or V-belt, automatic or manual tensioner, idlers, crankshaft damper, alternator pulley, water pump, A/C compressor, hydraulic steering pump, vacuum pump, and other vehicle-specific equipment. Diagnosis must identify the exact routing and driven loads, preserve the failure pattern, correct alignment or contamination, and verify every affected accessory after installation.
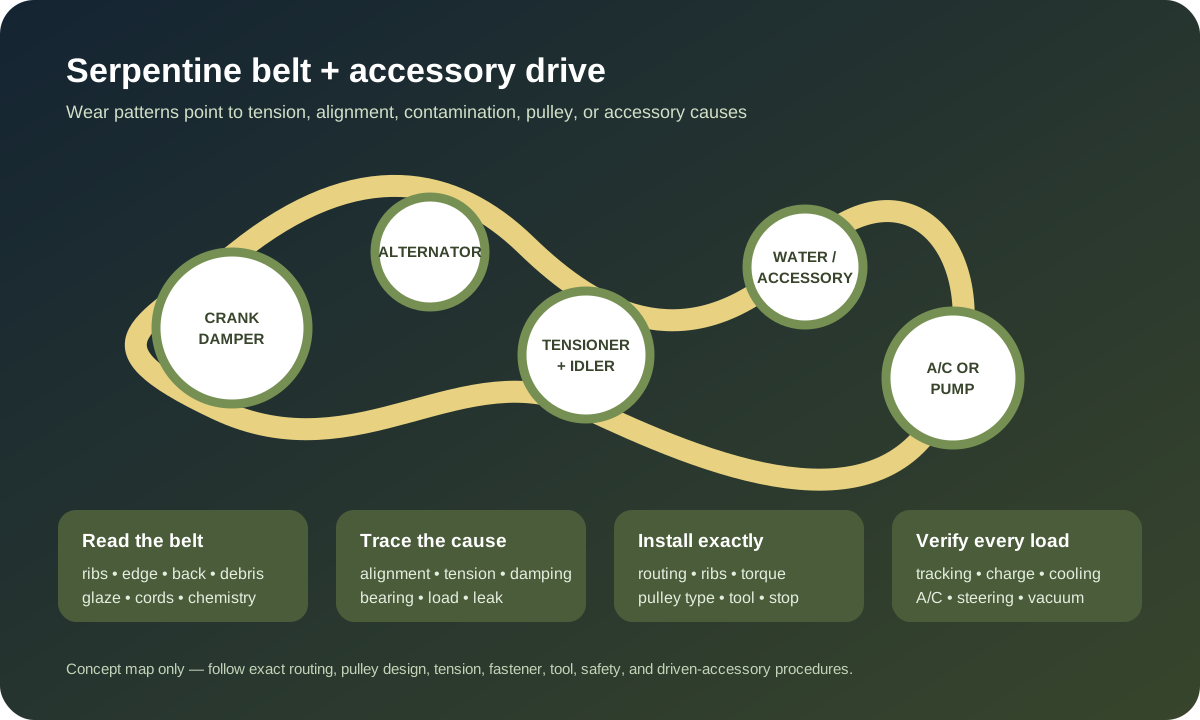
Stop for overheating, charging loss, control changes, smoke, or loose parts
Pull over safely and shut the engine down if a belt breaks or leaves its pulleys, the temperature warning appears, charging voltage drops with other symptoms, hydraulic steering effort rises suddenly, smoke or burning rubber appears, a pulley or tensioner is loose, or belt material can strike wiring, hoses or the cooling fan. The safe distance after a belt event cannot be assumed because the belt may drive the coolant pump, alternator, steering pump or vacuum source.
Keep hands, clothing and tools away from a running accessory drive. Electric fans can start with the engine off, and hybrid or stop/start systems may restart unexpectedly. Do not reach for a moving belt, reinstall it roadside over hot or rotating parts, or continue running the engine to identify a noise after severe tracking damage. Arrange recovery when cooling, steering, electrical supply or component retention is uncertain.
Distinguish accessory belts from timing belts and other drives
A serpentine or multi-rib belt usually drives external accessories and can often be inspected without removing sealed timing covers. A timing belt synchronizes crankshaft and camshaft position and has different failure consequences, replacement intervals and installation requirements. Some engines use multiple accessory belts, stretch-fit belts, conventional V-belts, wet belts, electric accessories or no belt for a function that another model drives mechanically.
Confirm VIN, engine code, production variation, installed equipment, routing label and service information before ordering parts or releasing tension. Identify every driven component, smooth and grooved pulley, rotation direction, automatic or manual tensioning, and whether an overrunning alternator pulley or crankshaft decoupler is present. A generic routing image or similar engine can place the belt on the wrong side of a pulley and reverse an accessory.
Record the sound and operating condition before removing the belt
Differentiate chirp, squeal, hiss, growl, rumble, knock, slap and intermittent contact. Record cold versus hot, idle versus speed, engine load, A/C command, steering input, electrical load, rain or wash, recent repair, and whether the sound follows engine speed. Photograph routing, tensioner indicator and arm position, belt tracking, debris, contamination and contact marks before disturbing evidence.
A chirp can relate to misalignment or rib contact; a sustained squeal can involve slip, low tension or high load; growl or rumble can originate in a bearing; slap or rapid tensioner motion can involve damping, accessory torque variation or an alternator decoupler. These patterns overlap. Sound location and a short recording guide inspection but do not prove which part failed.
Inspect both ribbed and back surfaces using wear and damage patterns
With the engine safely disabled and cool, inspect the full belt for rib material loss, glazing, cracks, chunking, separation, frayed edges, exposed cords, polished back, crosswise cuts, foreign objects, heat damage, swelling and chemical attack. Modern EPDM belts can lose rib material without displaying the dramatic transverse cracks familiar from older compounds, so use the applicable wear gauge or manufacturer criterion rather than appearance alone.
Edge wear points toward tracking, pulley damage, interference or misalignment. Localized missing ribs can relate to debris or a damaged pulley. A polished or hardened surface can support slip or heat but does not name the cause. Preserve the belt orientation and damaged section. Replacing it without identifying seizure, rough bearings, weak tension, incorrect length, misrouting, contamination or pulley displacement can produce another rapid failure.
Tensioners control force, alignment, and dynamic vibration
An automatic tensioner combines a spring, pivot, bearing and damping system designed for a particular drive. Continental explains that it maintains tension and helps damp accessory-system vibration; Gates notes that internal wear can cause noise, poor tension, oscillation and stress on driven components. The indicator may show operating range, but one pointer position does not prove smooth pivoting, correct damping or alignment.
Inspect the pulley surface and bearing, arm and pivot, mounting base and locating feature, spring force through its permitted travel, damping, stops, corrosion, cracks, looseness and side-to-side movement. Never open a spring-loaded tensioner assembly; stored energy can injure. Do not force it beyond its stop or use the release feature as a lifting point. A bouncing arm may be consequence of another drive fault as well as tensioner wear.
Idlers, bearings, and accessory shafts need unloaded inspection
After recording running behavior and following the safe release procedure, rotate and check each accessible pulley and accessory for roughness, binding, noise, play, runout, seal leakage and mounting integrity. Compare the water pump, alternator, A/C compressor or clutch, steering pump, vacuum pump and idlers without assuming every unit should spin freely for the same duration or feel identical.
Some components have internal drag, clutches or one-way behavior by design; an electric or high-voltage accessory may require separate isolation. A bearing can feel smooth cold and fail hot or loaded. Conversely, slight seal resistance is not proof of failure. Use manufacturer limits, stethoscope or vibration evidence, temperature patterns and load testing where applicable to connect the symptom to the shaft or bearing.
Alignment includes pulley planes, mounting surfaces, brackets, and belt seating
Angular or offset misalignment can result from a bent bracket, debris under a tensioner, incorrect spacer, worn pivot, damaged shaft, moved accessory, wrong pulley offset, distorted crankshaft damper, collision or previous installation. Sight lines help, but precise tools or reference points may be needed. A pulley that looks aligned at rest can move under torque if its mount or bearing is weak.
Gates directs installers to seat the tensioner mounting face correctly, align locating features, ensure every rib is in its groove and investigate any belt tracking toward a pulley edge. Clean mounting surfaces and compare pulley width, groove count, diameter and offset. Never run a belt with one rib off the pulley; it can shred, climb, damage nearby parts or pull material behind a seal or cover.
Overrunning alternator pulleys and crankshaft dampers can drive system oscillation
Some alternators use a solid pulley, one-way overrunning pulley or overrunning alternator decoupler. Continental explains that the one-way function transmits torque in one direction, while a decoupler can also damp vibration. Substituting the wrong design changes accessory-drive dynamics and can increase tensioner motion, slip, noise or component stress even when the pulley physically fits.
Test pulley locking, overrunning and spring behavior only through the appropriate tool and method; do not clamp or impact delicate internal parts without an approved procedure. Inspect the crankshaft pulley or torsional vibration damper for rubber cracking, separation, shifted timing marks, wobble, contact and runout. A failing damper can misalign the entire drive or imitate belt and tensioner faults.
Oil, coolant, fuel, washer fluid, and cleaners require source correction
Fluid can soften, swell, delaminate or reduce friction in a belt, collect abrasive dirt and attack tensioner or idler bearings. Trace engine oil, coolant, power-steering fluid, fuel, A/C oil or cleaning product to its first source. A wet belt does not prove the nearest component leaked; fluid may travel along covers, brackets, airflow or a rotating pulley.
Do not apply belt dressing, solvent, grease, adhesive, abrasive or water spray as a repair. Temporary noise change can obscure evidence and contaminate the drive. Correct the leak, clean pulleys with the approved method, replace a belt whose material has been compromised, and inspect bearings and dampers exposed to the fluid. Also verify that spilled service fluid or an overfilled reservoir will not recreate the contamination.
Replacement scope follows the failed relationship—not an automatic parts bundle
A complete estimate should state the belt or belts, tensioner, tensioner pulley, idlers, overrunning alternator pulley, crankshaft damper, driven accessory, bolts, caps, brackets and any leak repair included or excluded. Continental treats belt, tensioners and idlers as a system, but condition, manufacturer procedure, shared labor and failure consequence should still support each recommendation rather than presenting every adjacent part as failed.
Match length, rib count, width, material, profile and application. A belt that can be forced on may still be wrong and can place the indicator outside range. Confirm one-time hardware, pulley tools and torque. For stretch-fit belts, use the specified installation tool and replacement policy; do not substitute prying, screwdrivers or an automatic tensioner that the design does not have.
Installation protects ribs, bearings, stops, routing, and stored-energy components
Compare routing with the vehicle diagram before removal and preserve a clear reference. Release and control the tensioner using the designed feature and suitable tool; keep fingers out of pinch points. Clean grooves, mount components flush, align locating pins, use specified fasteners and torque, and route the belt with all ribs seated. Do not twist, sharply fold, lever or stretch a conventional belt onto a flange.
Before starting, rotate the engine by hand only when the vehicle procedure permits and confirm free travel, centered tracking and correct tensioner position. Remove every tool and lock, restore covers and wiring, and check that hoses remain clear. Battery disconnection can trigger initialization or memory procedures, while alternator or A/C work may add electrical or refrigerant steps outside the belt installation itself.
Verification includes tracking, every accessory, full load, heat, and reinspection
Start from a safe observation position and watch initial tracking, tensioner motion and pulley behavior without reaching into the drive. Stop immediately for edge travel, rib displacement, wobble, smoke, abnormal noise or contact. Confirm charging, cooling circulation and temperature, hydraulic steering where fitted, A/C operation, vacuum-dependent functions and warning status rather than assuming a rotating belt proves every accessory works.
Apply relevant electrical, A/C and steering loads through safe procedures, then repeat the original cold, hot, wet or engine-speed condition. Reinspect after shutdown for dust, fraying, contact, leakage, mounting movement and belt position. Document routing, parts and pulley types, tensioner and accessory findings, contamination repair, torque and operational checks. A quiet idle alone does not verify a fault that occurred only during deceleration, full load or heat.