
Glass and visibility technical guide
Windshield, wiper, washer, sensor, and camera work form one visibility system
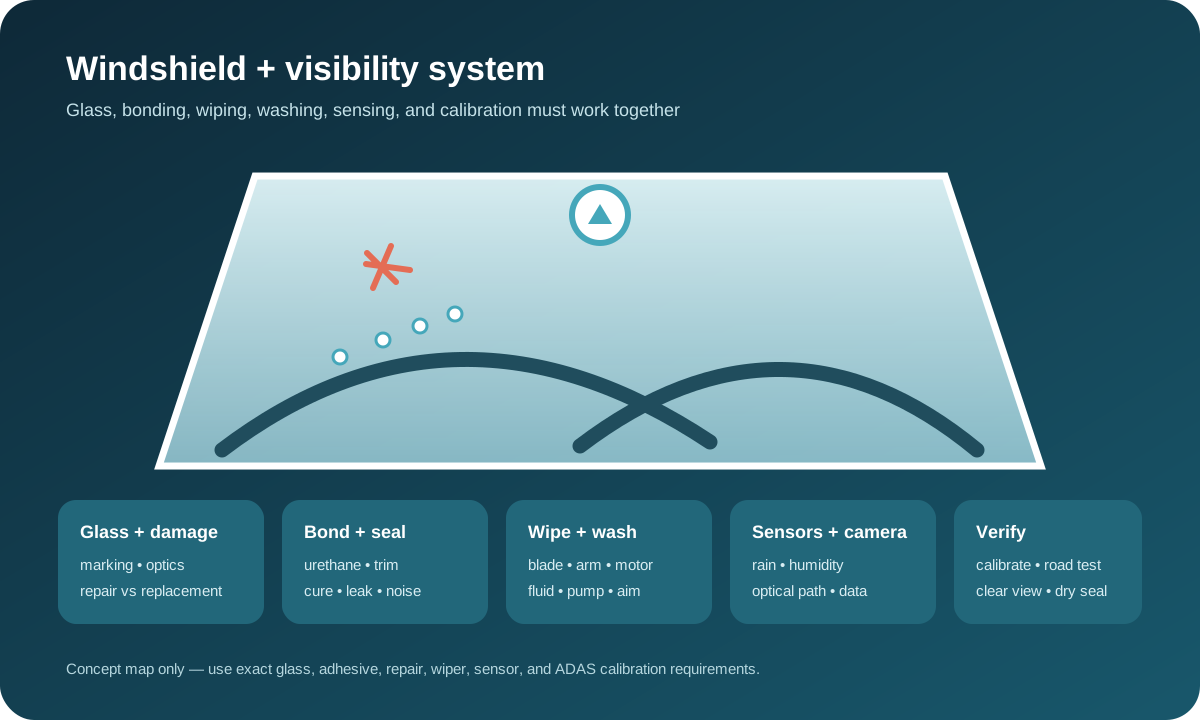
A chip, crack, water leak, streak, chatter, slow wiper, empty spray pattern, rain-sensor complaint, or driver-assistance warning does not always belong to one part. Safe visibility depends on certified glazing, unobstructed optical zones, secure bonded installation, correctly fitted wipers, a functioning washer system, undamaged trim and drains, and cameras or sensors that remain mounted and calibrated as the vehicle requires. A complete repair decision documents the damage, identifies installed equipment, separates repair from replacement, and verifies visibility in wet and dry conditions.
Do not drive when visibility, glass retention, or a loose wiper is unsafe
Stop in a safe location when a crack suddenly spreads through the driver’s view, loose glass or trim can detach, the windshield shifts, a wiper arm is loose or strikes outside the glass, rain or contamination cannot be cleared, washer fluid obscures vision, or a forward-view system warns while visibility is already poor. Slow down and increase distance before stopping; do not keep driving by looking through a small cleared opening.
Avoid pressing on damaged glass, using boiling water to remove ice, operating a wiper over sharp broken material, or applying household chemicals that attack coatings, rubber, paint, sensors, or adhesive. Keep occupants away from broken edges. A windshield contributes more than weather protection: visibility, occupant retention and the installed structure can be affected. Recovery or mobile professional assessment is appropriate when safe forward vision or secure installation cannot be established.
Record damage location, size, layers, contamination, and growth
Photograph the full windshield and close detail with scale, noting the driver sight area, edges, ceramic border, camera or sensor zone, defroster and antenna elements, previous repairs, impact point, legs or cracks, missing glass, dirt, moisture, and whether damage reaches more than one layer. Record temperature change, body flex, impact, prior collision or glass work, and whether the crack is actively spreading.
Damage is not classified reliably by diameter alone. Depth, shape, edge proximity, number of impacts, crack length and branching, contamination, optical distortion, laminate condition, and vehicle or repair-system limits affect repairability. NHTSA points to visibility, likelihood of growth, occupant retention and overall safety as relevant factors. A generic coin comparison cannot override the exact glass-repair standard, technician system, law, insurer requirement, or vehicle-maker restriction.
Repair preserves existing glass only when the damage and optical result qualify
A resin repair generally aims to stabilize suitable localized damage, reduce further propagation and improve appearance; it does not make every mark disappear or restore untouched glass. The process depends on cleaning and drying the damage, controlling temperature, removing trapped air where the system provides, injecting compatible resin, curing it correctly, finishing the surface, and confirming that the result does not create unacceptable distortion.
Do not drill, heat, press, tape over contamination, or inject consumer material into damage without understanding the consequences. Moisture, dirt and previous failed resin can reduce the chance of an effective professional repair. The estimate should state whether the result is stabilization, appearance improvement, or replacement avoidance; what remains visible; what warranty applies; and what condition would require replacement instead. A repaired point in a camera or critical sight zone may remain unacceptable even if structurally stable.
Replacement requires the correct certified glazing and installed features
NHTSA states that replacement glazing must meet FMVSS 205 and carry required certification markings. Match the exact vehicle, body, production variation, tint or shade band, acoustic or infrared layer, antenna, heating, head-up display, rain or humidity sensor area, camera bracket, mirror mount, VIN window, molding, and any other embedded or attached feature. Similar dimensions do not prove optical or system compatibility.
Inspect delivered glass before installation for marking, distortion, chips, scratches, bracket position, frit coverage, connector and element integrity, curvature, and fit. A missing coating or incorrectly positioned bracket can affect a camera, head-up display, radio, defrost, toll device, or sensor. The glass, adhesives, primers and moldings should be traceable on the work record rather than described only as “windshield.”
Bonding preparation and cure time are safety-critical parts of installation
Removal must protect the body aperture, paint, interior, dashboard, wiring, camera equipment and retained urethane according to the approved method. Corrosion, previous excessive cuts, bent pinchweld, missing clips, water paths, or earlier nonstandard materials change the repair scope. Cleanliness, primer use, adhesive lot and temperature, bead size and shape, glass position, fixture time and environmental conditions follow the adhesive and vehicle procedures.
Safe drive-away time is not one universal number. It can depend on urethane, humidity, temperature, airbags, glass mass, application and manufacturer instructions. Do not move the vehicle early, slam doors, remove retention tape, wash aggressively, or disturb trim contrary to the documented curing requirements. The completed record should identify the bonding system, conditions, installation time, stated safe drive-away time, and any restrictions communicated to the driver.
Leaks, wind noise, trim movement, and distortion need source-specific diagnosis
Water near the windshield can originate at the bond, body seam, roof or sunroof drain, cowl, plenum, washer line, roof rail, door seal, HVAC drain, or prior body repair. Wind noise can involve glass height, molding, gaps, mirrors, roof equipment, door seals or body fit. Use a controlled water, air, smoke, sound or pressure method appropriate to the vehicle; flooding electronics or using damaging pressure is not a valid shortcut.
Optical waviness, double images, head-up-display ghosting or visual strain should be assessed from the normal driving position in relevant light and road conditions. A dry perimeter does not prove optical quality, and a quiet stationary vehicle does not prove highway sealing. Document the exact source and correction rather than adding exterior sealant that can hide a failed bond, trap water, block drains or complicate later replacement.
Wiper streaking is a system symptom, not always a blade diagnosis
Streaks, haze, chatter, judder, skipping, squeal, missed areas, lift at speed or poor parking can result from worn or contaminated rubber, wrong length or connector, incorrect spoiler orientation, bent arm, weak spring, damaged pivot, dry glass, wax, silicone, oil, tree sap, road film, ice, glass damage, coating incompatibility, motor or linkage faults, or a distorted windshield.
Clean the glass and blade edge with compatible products, inspect rubber for splits, hardening, deformation and embedded debris, and verify exact blade fitment and arm seating. Do not bend an arm by guesswork or replace blades repeatedly when the sweep geometry, spring load, glass surface or linkage is wrong. Some vehicles use service positions or software-controlled parking; forcing an arm from below the hood can damage paint, pivots, gears or the glass.
Slow, dead, colliding, or misparked wipers require mechanical and electrical tests
Inspect the arms, retaining hardware, splines, pivots, linkage, bushings, motor mounting and interference before electrical conclusions. Snow, ice, leaves or a seized pivot can overload the motor or strip a connection. Confirm that both blades stay within the intended wipe area, do not collide, and park correctly; a loose arm may move unloaded yet slip when the blade meets wet glass.
Use the exact circuit and scan information to test fuses, power and ground under load, switch inputs, relays or solid-state drivers, motor current, position feedback, body-control commands, communication and intermittent or rain-sensing logic. Battery voltage and energy management can affect operation. A stored motor or park code remains a test direction, not proof that the motor assembly is bad. Avoid powering unknown terminals or defeating pinch and automatic-start protections.
Washer diagnosis includes fluid, freeze protection, delivery, and aiming
Verify the approved washer fluid and climate protection, reservoir and cap, pump or reversible pump, grommet, level sensor, hoses, connectors, check valves, heaters, nozzles, wiper-arm passages and rear circuit where fitted. A motor sound does not prove adequate flow. A split hose can discharge behind trim; a clogged filter, frozen fluid, wrong mixture, blocked nozzle or reversed connection can produce weak or misdirected spray.
Do not use hot water, coolant, dish soap, harsh solvent or unapproved additive as washer fluid. Some products can freeze, foam, attack coatings and seals, leave glare-producing residue, or damage paint and sensors. Aim only through the specified method, because excessive needle force can damage calibrated nozzles. Confirm coverage at rest and, when safe, at relevant airflow; inspect that fluid clears rather than obscures the camera and driver view.
Rain, light, humidity, heating, and camera equipment change glass work
Identify every component mounted to or looking through the windshield: rain/light sensor, humidity or condensation sensor, forward camera, infrared unit, mirror electronics, antenna, heating grid, washer heater, head-up display and toll or connectivity equipment. Gel pads, optical couplers, brackets, masks and clips must be correct, clean, bubble-free and positioned as specified. Reusing a damaged pad or stacking material can distort a sensor path.
After reconnecting, verify codes, data and functions rather than assuming attachment is enough. Automatic wipers should be tested with an appropriate controlled input; heated zones and antennas need circuit checks where disturbed. Camera visibility can be affected by dirt, tint, distortion, incorrect glass, a misplaced bracket or optical material. A warning after replacement may reflect installation, voltage, coding, calibration or another module—not automatically a failed camera.
ADAS calibration follows the exact vehicle process, not a generic road drive
Audi technical guidance links windshield and camera condition with calibration and directs technicians to guided procedures. Depending on vehicle, replacement or camera disturbance can require static calibration, dynamic calibration, both, or a documented check. Prerequisites can include correct tire pressure, ride height, alignment, fuel or load state, level floor, target distance, lighting, clean glass, software, module health and steering-angle status.
Read all relevant codes before work, identify calibrations required by the exact equipment and repair operation, and record equipment, setup and results. A calibration tool reporting completion should be paired with normal module status and functional road verification where specified. Do not return driver-assistance features as operational when required calibration failed, prerequisites were not met, or warnings remain; explain limitations and arrange the proper next step.
Final verification covers visibility, sealing, operation, and documentation
Inspect glass position, molding and trim, cowl, clips, mirror and sensor covers, VIN opening, interior cleanliness, paint protection, wiring, drains and every disturbed fastener. Confirm dry installation through an approved leak check, clear undistorted sight lines, wiper sweep and park, washer coverage, blade clearance, defog and heat functions where applicable, and no new wind noise or warning status under relevant conditions.
Verify rain sensing, forward camera and driver-assistance functions and retain calibration evidence when required. Give the driver the safe drive-away time, tape and cleaning instructions, feature limitations, repair visibility expectations, and signs requiring return: spreading damage, water, noise, loose trim, poor wiping, distortion or warning messages. The final record should identify glass and markings, repair or replacement method, adhesive system, cure conditions, wipers and washer work, sensor handling, calibration and outcome.