
Engine lubrication technical guide
Oil maintenance and oil-temperature faults require different evidence
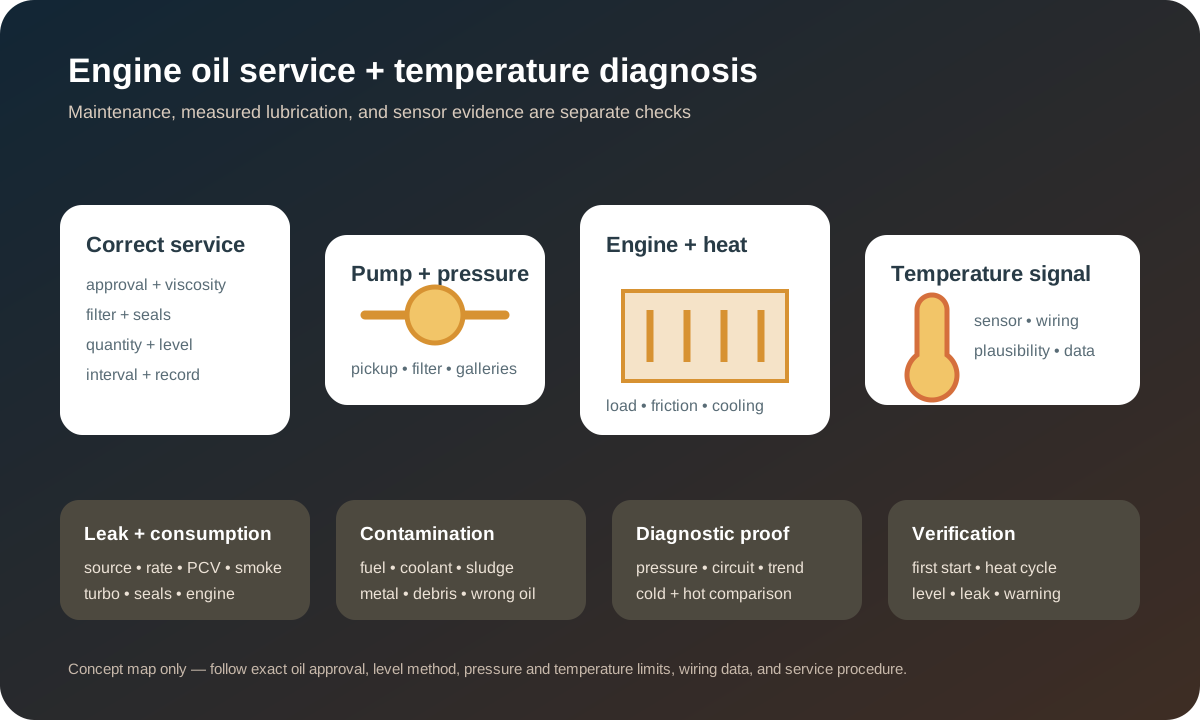
An oil change is scheduled maintenance; a red pressure warning, high-temperature message, oil-temperature code, leak, smoke, consumption concern, debris finding, or abnormal engine noise is a diagnostic problem. Fresh oil may be part of the repair, but it does not prove that pressure, temperature control, level sensing, wiring, sealing, or internal engine condition is healthy. A complete plan identifies the exact oil requirement, preserves warning data, checks the installed work, and separates a sensor or circuit fault from a real lubrication or thermal event.
Stop the engine for pressure loss, severe noise, rapid leakage, or smoke
A red oil-pressure warning, sudden heavy knock, rapidly increasing valve-train or timing noise, oil pouring from the vehicle, a damaged filter or pan, or smoke from oil reaching a hot exhaust calls for a safe stop and engine shutdown. Do not keep driving because the level appears normal and do not repeatedly restart to see whether the warning clears. Pressure loss can damage bearings, camshafts, timing systems, turbochargers, cylinder walls, and other lubricated parts quickly.
Record the exact symbol or message, engine speed, oil and coolant temperature, vehicle motion, cornering or braking, recent service or oil addition, leakage, odor, smoke, sound, and whether the event appeared at cold start, idle, cruise, or load. Check level only through the safe vehicle procedure. A correct level does not prove adequate pressure, and a low level does not explain where the oil went or whether damage occurred.
Identify the full oil requirement—not viscosity alone
SAE viscosity grade describes defined low- and high-temperature flow behavior, but it is only one part of selection. Manufacturer approval or performance requirement, API or other category, emissions-system compatibility, engine and market, climate allowance, fuel type, and service information may matter. API directs owners to follow the vehicle manufacturer’s recommendations before using its category charts.
Confirm the VIN, model year, exact engine, installed emissions equipment, operating market, and applicable owner or service information. Use a product that explicitly carries the required approval or supported compatibility rather than one selected by color, brand habit, marketing terms, or a familiar viscosity. Record brand, product, viscosity, approval and quantity so later service does not depend on memory or an unlabeled bulk source.
Set the interval from time, mileage, use, and verified history
Use the applicable maintenance schedule or service display plus any severe-use provisions. Mileage alone may not capture repeated short trips, cold starts, prolonged idling, towing, dust, heat, fuel dilution, track use, long storage, or regeneration duty. Do not impose one universal short interval, but do not ignore a calendar limit or operating condition stated by the manufacturer.
When service history is incomplete, inspect level, leakage, current warnings, filter and cap evidence, visible deposits without harmful disassembly, records, and the installed oil when it can be identified. Establish a documented baseline with the correct material. Do not promise that one change reverses sludge, varnish, wear, contamination, consumption, overheating, an incorrect prior fill, or damage caused while pressure was low.
Capacity, level, and electronic measurement require the exact procedure
Published dry capacity can differ from the amount drained because oil remains in galleries, cooler, turbocharger, filter housing, and other components. Fill with the specified starting amount, then verify using the dipstick or electronic-level process at the required surface, temperature, engine state, and wait time. Some electronic systems require an operating or drive cycle and will not update immediately after service.
Underfill can uncover the pickup during braking, acceleration or cornering. Overfill can promote aeration, crankshaft contact, leakage, ventilation-system carryover, deposits, smoke, or catalyst damage. A warning after service can involve actual level, the filter or housing, cap, drain hardware, seal, sensor, connector, procedure, or spilled residue. Recheck the work and measured level instead of resetting the message or adding oil blindly.
Oil and filter installation details can create immediate failures
Verify the filter element or assembly, housing cap, center tube, bypass or drain components, O-rings, sealing-surface condition, drain plug or extractor procedure, washer, pan threads, undertray, and access-panel retention for the exact engine. A doubled gasket, displaced O-ring, wrong filter, incorrect cap torque, damaged drain threads, or residual old seal can cause leakage or pressure loss even when the oil itself is correct.
Clean around openings before exposure, compare removed and replacement parts, install seals only in their designed grooves, lubricate only as specified, and use calibrated torque where required. Inspect the removed filter and drained oil for abnormal debris, coolant, fuel odor, water, seal material, or metal without treating normal color as a laboratory diagnosis. Account for tools, caps and fasteners before starting; then observe pressure indication and leakage immediately.
Trace leakage and consumption instead of relying on repeated top-offs
Find the highest fresh source around the filter or housing, drain point, oil pan, valve or timing covers, crank or cam seals, cooler, turbocharger lines, vacuum pump, pressure or level sensor, ventilation system, and mating surfaces. Oil follows gravity and airflow and can collect on shields or subframes far from the source. Document wetness before cleaning and reproduce the temperature, engine speed, crankcase pressure, or road condition that exposes it.
Consumption can involve external loss, crankcase ventilation, turbocharger sealing, valve guides or seals, piston rings and cylinders, fuel dilution, operating conditions, or an incorrect level baseline. Measure over a defined distance using the same verified method; smoke and tailpipe deposits are supporting evidence, not calibrated quantity. Repair the cause of abnormal use rather than assuming thicker oil, an additive, or more frequent topping-off is universally safe.
Pressure diagnosis must use a measurement, not only a switch or scan value
Oil pressure depends on level, viscosity and temperature, pump supply, pickup sealing, filter restriction and bypass behavior, pressure regulation, bearing clearances, galleries, control valves, variable-timing demand, and engine speed. A pressure switch commonly reports only whether a threshold was crossed, while a pressure sensor may provide a range. A warning circuit can fail, but treating every warning as electrical can sacrifice the engine.
Preserve codes and data, inspect the circuit, and verify actual pressure with rated equipment and the exact adapter and test conditions when the evidence requires it. Compare cold and fully warm values at specified speeds, and note mechanical noise and oil temperature. A single high cold reading or acceptable idle result cannot prove hot loaded pressure. If pressure is genuinely low, stop testing that risks further damage and define pickup, pump, regulation, bearing, leakage, contamination, or internal inspection steps.
Oil temperature reflects load, cooling, friction, and measurement strategy
Oil warms from bearings, pistons, turbochargers, valvetrain, pump work and contact with engine structure; it can exchange heat through the sump, coolant-to-oil exchanger, air-to-oil cooler, and airflow. Ambient temperature, warm-up duration, engine speed and load, towing, track use, coolant control, oil level and grade, airflow, cooler condition, and calibration all affect the observed value. One universal “normal” temperature is not appropriate for every vehicle.
A genuine high-temperature event can thin the oil, accelerate oxidation, reduce margin and accompany coolant, airflow, mixture, friction, load, or lubrication faults. An unexpectedly low or fixed reading can reflect insufficient warm-up, thermostat or cooler behavior, substituted data, sensor bias, wiring, or display filtering. Compare oil temperature with coolant, ambient, operating time, load, vehicle speed and known system behavior instead of condemning a sensor from one number.
An oil-temperature sensor code describes a monitored circuit or performance fault
HELLA describes oil-temperature sensing with a temperature-dependent resistor and notes that some modern designs integrate oil temperature with the level sensor. Codes can concern circuit range, low or high voltage, intermittent behavior, implausibility, correlation, or internal module processing. Possible causes include power or reference supply, ground, signal wiring, terminal fit, oil intrusion, impact, heat, internal sensor failure, incorrect part, or a real temperature condition.
Record freeze frame and compare the value before startup with ambient, coolant and intake temperatures when the vehicle exposes them. Inspect connectors and harness routing, then test resistance, voltage, continuity, shorting, signal response, or network data using the exact diagram and temperature table. Do not apply a generic resistance value to an integrated intelligent sensor, and do not replace a sensor because the code contains its name without checking supply, ground and signal integrity.
Contamination and debris determine a larger repair boundary
Coolant can form emulsion or alter lubrication; fuel dilution can reduce viscosity and raise level; water, sludge, carbon, sealant, wrong oil, cleaning chemicals, belt material, bearing metal, timing-guide debris, or turbocharger fragments can circulate or restrict screens and control passages. Appearance and odor guide inspection but do not quantify viscosity, fuel, coolant, additive condition, wear metals, oxidation, or remaining useful life.
Where the decision justifies it, a properly sampled laboratory analysis can support trends, but one result still needs operating history and sampling context. Preserve the filter and representative debris. Identify the source, where material traveled, which coolers, galleries, screens, actuators, pumps or turbo components can be cleaned or verified, and which need replacement. A drain-and-fill cannot guarantee that trapped contamination is removed or that a damaged component is restored.
Resetting a service reminder is not the same as clearing a fault
A maintenance reminder tracks a time, mileage or calculated service interval; a pressure warning, level warning, temperature message or diagnostic code reports a different condition. Reset the maintenance indicator only after the specified service is complete and documented. Do not erase a fault, suppress a warning, change coding, or reset adaptations to make the dashboard quiet without proving the underlying system.
Before clearing any diagnostic memory, save confirmed, pending and permanent codes, freeze frame, temperature, level status, pressure data where available, service history and warning conditions. Disconnecting the battery can remove useful context and affect readiness or learned values. If a sensor or circuit was repaired, prove its cold plausibility, warm response and stability through the relevant range rather than relying only on an absent lamp at idle.
Verification spans first start, full temperature, cool-down, and documentation
Before startup, confirm the filter, drain and fill points, cap, connectors, underbody panels, quantity and no tools or absorbent material left behind. Start without immediately raising speed, confirm prompt normal pressure indication, and inspect for leakage while watching level, temperature, noise and warnings. Shut down for abnormal pressure or sound; do not continue merely to complete a checklist.
Bring the engine through the appropriate operating condition, verify level by its exact method, inspect hot leakage and temperature relationships, and repeat the original symptom safely. After cool-down, recheck level and disturbed areas. Document the exact oil and filter, quantity, approval, date and mileage, removed-part findings, pressure or sensor tests, reminder reset, remaining leaks or consumption plan, and any follow-up sampling. A successful service demonstrates both correct maintenance and resolution—or clear separation—of the original diagnostic concern.